Google Ads Conversion Tracking with GTM & GA4: A Step-by-Step Guide for Small Business Owners
Reading time: ~12 minutes
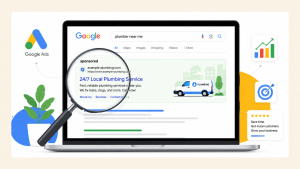
If you're running Google Ads and not tracking conversions properly, you're flying blind. You see clicks, you see spend, but you have no real way to know which keywords, ads, or campaigns are actually making you money.
The good news? Setting up conversion tracking the right way — using Google Tag Manager (GTM) and Google Analytics 4 (GA4) — is something any small business owner can do in about 30 minutes. You don't need a developer. You don't need to touch your website's code more than once.
This guide walks you through the complete setup, step by step, in plain English. Whether you've never opened these tools before or you've poked around and got stuck, you'll be able to follow along.
Here's what you'll have working by the end:
- Google Tag Manager installed on your website
- GA4 firing properly through GTM
- A conversion event tracked in GA4 (like a form submission or purchase)
- That conversion imported into Google Ads so it can optimise your campaigns
Let's get into it.
Why bother with GTM and GA4? (And not just the Google Ads tag)
Quick context before we start clicking buttons.
You can install the Google Ads conversion tag directly on your website. It works. But here's why almost every serious marketer uses GTM + GA4 instead:
- One container, every tag. GTM holds your Google Ads tag, GA4 tag, Meta Pixel, LinkedIn Insight tag, and anything else — all in one place. No more digging through your website code every time you want to add or change something.
- No developer required. Once GTM is installed (a one-time job), you can add or change tracking yourself.
- Better data. Importing GA4 conversions into Google Ads gives you a richer view of what users do on your site, not just whether they hit a "thank you" page.
- Future-proof. As privacy rules tighten and cookies disappear, this stack handles things like enhanced conversions and consent mode much more gracefully.
A quick note on terminology: Google renamed "conversions" to "key events" in GA4 to reduce confusion between platforms. So when you're inside GA4, you'll see key events. Inside Google Ads, they're still called conversions. Same idea — just different labels in different rooms of the same house.
What you'll need before you start
Five quick things. Get these sorted and the rest of the setup is smooth.
- A live website you can edit (or someone who can paste a code snippet for you, just once).
- A Google account — the same one you use for Google Ads ideally, to keep things tidy.
- A Google Ads account with at least one campaign set up (or planned).
- Admin access to your website's CMS (WordPress, Shopify, Wix, Webflow, Squarespace — they all work).
- About 30–45 minutes of uninterrupted time. This isn't hard, but you don't want to rush it.
If you're already using GA4 or GTM, great — skip ahead to the section that picks up where you are.
Step 1: Set up Google Tag Manager (5 minutes)
Think of GTM as a control panel. Instead of pasting different tracking codes into your site, you paste GTM once, then manage everything inside the GTM dashboard.
Create your GTM account and container
- Go to tagmanager.google.com and sign in with your Google account.
- Click Create Account.
- Fill in:
- Account Name: Your business name.
- Country: Where you're based.
- Container Name: Your website domain (e.g., yourbusiness.com).
- Target Platform: Web.
- Accept the Terms of Service and click Create.
You'll now see two code snippets pop up. Don't panic — this is the only time you'll touch code in this whole process.
Install the GTM code on your website
You need to add two snippets to every page of your site:
- Snippet 1 goes inside the
<head>section, as high up as possible. - Snippet 2 goes immediately after the opening
<body>tag.
How you add these depends on your CMS:
- WordPress: Use a plugin like "GTM4WP" or "Site Kit by Google." Both let you paste your GTM ID and handle the rest.
- Shopify: Settings → Customer events → Add custom pixel, or paste into
theme.liquid. - Wix / Squarespace: Both have native GTM integration in Settings → Marketing tools.
- Webflow: Project Settings → Custom Code, paste both snippets.
- Custom-coded site: Have your developer add them once. They'll never need to touch it again.
Verify GTM is installed
This is the step most beginners skip — and it bites them later. Always verify.
- Install the free Tag Assistant Companion Chrome extension.
- Visit your website.
- Click the Tag Assistant icon. You should see a green icon and your GTM container ID listed.
If it's not firing, the most common culprits are: caching (clear your CMS cache), or the snippets sitting in the wrong location. Fix and re-check before moving on.
Step 2: Set up GA4 and connect it through GTM (10 minutes)
GA4 is where you'll actually define what counts as a meaningful action — a form submission, a purchase, a phone click. Then we'll send that information to Google Ads.
Create your GA4 property
- Go to analytics.google.com and sign in.
- Click the gear icon (Admin) at the bottom-left.
- Click Create → Property.
- Fill in your property name (your business name works), reporting time zone, and currency.
- Add your business details and choose your business objectives.
- Under "Choose a platform," select Web.
- Enter your website URL and a stream name (e.g., "Main Website").
- Click Create stream.
You'll see a screen with your Measurement ID — it starts with "G-" followed by a string of characters. Copy this. You'll need it in 30 seconds.
Add the GA4 tag inside GTM
Here's where the magic of GTM kicks in — instead of pasting another script onto your site, you'll just configure a tag inside GTM.
- In GTM, click Tags in the left menu → New.
- Name it something clear like "GA4 — Configuration".
- Click the Tag Configuration box and choose Google Tag.
- Paste your Measurement ID (the "G-XXXXXXX" code) into the Tag ID field.
- Click the Triggering box and choose All Pages.
- Click Save.
Test before you publish
GTM has a Preview mode that's incredibly useful. Use it.
- In the top-right of GTM, click Preview.
- Enter your website URL and click Connect.
- A new tab opens with your site. Browse around.
- Switch back to the GTM Tag Assistant tab. You should see your "GA4 — Configuration" tag listed under "Tags Fired."
To double-check the data is reaching GA4: open GA4 in another tab, go to Reports → Realtime. You should see yourself listed as an active user within a minute.
If everything looks good, head back to GTM and click Submit in the top-right. Add a version name (something like "Initial GA4 setup") and click Publish.
Step 3: Create the conversion event in GA4 (10 minutes)
Now we tell GA4 what to actually measure. For most small businesses, the conversion is a form submission (lead) or a purchase (e-commerce). Let's walk through the form-submission example since it's the most common.
Create the trigger in GTM
The trigger tells GTM when to fire your tracking — in this case, when someone submits a form.
- In GTM, go to Triggers → New.
- Name it "Form Submission — Contact".
- Click Trigger Configuration → Form Submission.
- Check Wait for Tags and Check Validation (this prevents tracking failed submissions).
- Under "This trigger fires on," choose Some Forms.
- Set the condition to Page URL contains /contact (or whatever your contact page URL is).
- Save.
Quick tip: if your form uses something like Calendly, HubSpot, or a chatbot, the standard "Form Submission" trigger might not catch it. In that case, search for "[your form tool] + GTM tracking" — most major tools have a documented workaround.
Create the GA4 event tag
- In GTM, go to Tags → New.
- Name it "GA4 — Event — Form Submit".
- Tag Configuration: choose Google Analytics: GA4 Event.
- For "Measurement ID," select your GA4 configuration tag from the dropdown.
- For "Event Name," type lead (this is one of Google's recommended event names — using their standard names unlocks better reporting).
- Triggering: choose the "Form Submission — Contact" trigger you just made.
- Save.
Mark it as a Key Event in GA4
This is the step everyone forgets, and then wonders why nothing imports into Google Ads.
Important to know: GA4 only shows your event in this list after it has fired at least once. So before doing this step, submit a test form on your site and wait 1–2 minutes for the event to register.
- In GA4, click the gear icon (Admin) at the bottom-left.
- Under the Property column, expand Data display → click Events.
- Find your lead event in the list of events.
- Click the star icon on the left side of the event row.
- The star turns solid — your event is now a key event.
According to Google's official documentation on key events, only events marked as key events become available to import into Google Ads as conversions.
Stuck somewhere along the way?
We help small business owners get this set up properly — no jargon, no half-finished setups. If you'd rather skip the trial-and-error, we can do it for you.
Get help setting it up →Step 4: Link Google Ads with GA4 (5 minutes)
Before you can import your conversion into Google Ads, the two accounts need to be connected.
- In GA4, go to Admin.
- Under the Property column, find Product links → click Google Ads links.
- Click Link.
- Choose your Google Ads account from the list and click Confirm.
- Leave the default settings on (enable personalised advertising and auto-tagging) and click Submit.
That's it. The two accounts are now talking to each other.
Step 5: Import your GA4 conversion into Google Ads (5 minutes)
Now we tell Google Ads: "Hey, this form submission in GA4 is a conversion I care about. Optimise my bidding around it."
Google Ads recently updated this flow, so the steps below match the current interface (as of 2026):
- In Google Ads, click Goals in the left menu (it looks like a flag icon).
- Click Conversions → Summary.
- Click + New conversion action.
- You'll see a 3-step wizard at the top: Get started → Create conversion actions → Summary.
- In the "Get started" step, choose your conversion goal (e.g., Submit lead form or Contact) and click Save and continue.
- In the "Create conversion actions" step, click + Create conversion.
- A "Select data source" panel appears. Scroll down past Website, App, and Phone options until you find Google Analytics 4 properties.
- Select Web.
- You'll now see a list of your GA4 key events. Find lead in the list and tick the checkbox next to it.
- Click Import and continue.
- Click Save and continue, then Done on the summary page.
Your conversion is now imported. Within 24 hours, Google Ads will start showing conversion data in your campaign reports.
If you don't see "Google Analytics 4 properties" as an option in the data source panel, your GA4 property isn't linked to this Google Ads account yet — go back to Step 4 and complete the linking first.
A quick note on attribution
By default, Google Ads now uses data-driven attribution — meaning it figures out which clicks actually contributed to conversions, instead of just giving credit to the last click. For most small businesses, this is the right setting. Don't change it unless you have a specific reason to.
Step 6: Verify everything is working (the part most people skip)
Setting up tracking and not testing it is like sending a package without checking the address. Here's the 10-minute verification checklist that catches almost every common issue.
Test 1: Submit a real form
- Open your website in an incognito window (this avoids any cached data).
- Go to your contact page and submit a test form.
- Wait two minutes.
Test 2: Check GA4 Realtime
- In GA4, go to Reports → Realtime.
- Scroll down to the "Event count by Event name" panel.
- You should see lead listed, with a count of 1 (or however many tests you ran).
- Bonus: check the "Key events by Event name" panel — your lead event should appear here too with a matching count.
If it's not showing up: go back to GTM, click Preview, and run through the form submission again. Watch which tags fire. If your "GA4 — Event — Form Submit" tag isn't firing, the trigger isn't matching properly. Adjust the trigger conditions and re-test.
Test 3: Check the Google Ads conversion column
Google Ads doesn't show conversion data in real time — it usually takes 3 to 24 hours. Check back the next day.
- In Google Ads, go to Goals → Conversions → Summary.
- Find your imported conversion in the list.
- The "Status" column should say Recording conversions.
If after 48 hours it still says "No recent conversions," go back through the chain: GTM tag firing → GA4 event recording → GA4 key event marked → Google Ads import. The break is somewhere in that sequence.
Common mistakes to avoid
Here are the four issues that cause about 80% of conversion tracking problems for small businesses. Worth a read before you wrap up.
1. Counting the same conversion twice
If you have the old Google Ads conversion tag and an imported GA4 conversion both tracking the same form, you'll double-count every lead. Pick one (the GA4 import is the modern recommendation) and remove the other. Or, mark one as "secondary" so it doesn't affect bidding.
2. Forgetting to mark the event as a Key Event in GA4
This is the single most common issue. The event fires, you see it in GA4 reports, but it never appears in the Google Ads import list. Why? Because you forgot to click the star icon to mark it as a key event. Go to Admin → Data display → Events and tap the star.
3. Tracking page views instead of actual conversions
A common shortcut is to track "thank you page" visits as a conversion. This works, but it's brittle — if someone bookmarks the thank you page, refreshes it, or it loads accidentally, you get a fake conversion. Tracking the actual form submission event (what we did above) is more accurate.
4. Not setting up Enhanced Conversions
Enhanced Conversions send hashed first-party data (like email addresses from your form) back to Google to improve attribution accuracy. According to Google's official guide, enabling Enhanced Conversions can recover conversions that would otherwise be lost to browser restrictions and ad blockers. Once your basic tracking is working, set this up next — it's worth it.
What to do next
Now that your conversion tracking is live and verified, here's what should be on your roadmap over the next few weeks:
- Add more conversion events. Phone clicks, newsletter sign-ups, pricing page visits — anything meaningful to your business. Repeat the GTM → GA4 → Google Ads flow for each.
- Switch on Enhanced Conversions. Especially if you're spending more than a few hundred dollars a month on ads. The accuracy boost pays for itself.
- Move to Smart Bidding. Once Google Ads has 30+ conversions in a 30-day window, you can switch your campaigns to Maximise Conversions or Target CPA bidding. The algorithm uses your conversion data to find more of the right kind of customer.
- Watch for the new GTM integration. Search Engine Land recently reported on a new Google Ads feature that lets you push conversion setups directly into GTM with a single click. It's still rolling out, but it'll make this whole process even simpler.
Final thoughts
Conversion tracking sounds technical, but at its core it's just a chain: something happens on your site → GTM notices → GA4 records it → Google Ads learns from it. Once you've set this up once, every future tracking question becomes "where in the chain do I add this?" — and the answer is almost always GTM.
The hour you spend on this setup will pay you back many times over. You'll stop guessing which campaigns work. You'll stop wasting budget on keywords that don't convert. And you'll have the data to make every advertising dollar work harder.
Want us to set this up for you?
If you'd rather skip the setup and have someone reliable handle it for you, we'd love to help. We work with small business owners every day to get their tracking, ads, and analytics running properly — so you can focus on running your business.
- Complete GTM, GA4 & Google Ads conversion setup
- Properly tested & verified before handover
- A short walkthrough so you understand what's running
- No long-term contract — one-time setup or ongoing support
Published by googlemarketing.io — helping small businesses get more out of Google Ads, Analytics, Tag Manager, and SEO.